In this article, we will practice how quickly you can change the Domain Name setting using AWS ROUTE 53 service
You may have some questions like What is AWS ROUTE 53 and how it works for my website DNS (Domain Name System)?
Your DNS (Domain Name System) works on TCP PORT (Transmission Control Protocol) Number: 53 this is the reason it was named ROUTE53. Now you must be thinking what is DNS? DNS stands for Domain Name System or in simple DNS. It converts your domain name into IP Address in machine language. For example, let us say you have a website name called www.youtube.com now you copy this domain name and paste it in the Web Browser URL, and hit enter. You will see that your youtube page opens and you can view the entire page content.
This happens because when you type the domain name in the URL the server(machine) does not understand the human language it will convert your domain name to its IP Address internally and using the route method it will redirect to your domain. This is how your Domain Name System works.
“One thing to remember in DNS is that every Domain Name of the website has its unique IP Address to which it will connect and show the website content. There cannot be more than one IP Address connected to DNS.”
What are the advantages of using ROUTE53?
- Easy Setup
- Cost-Efficient
- Secure and reliable
- Low latency based routing
- Scalable to million requests
- Perform automated health checks and monitoring
Let us now proceed with setting your domain name using AWS Route 53
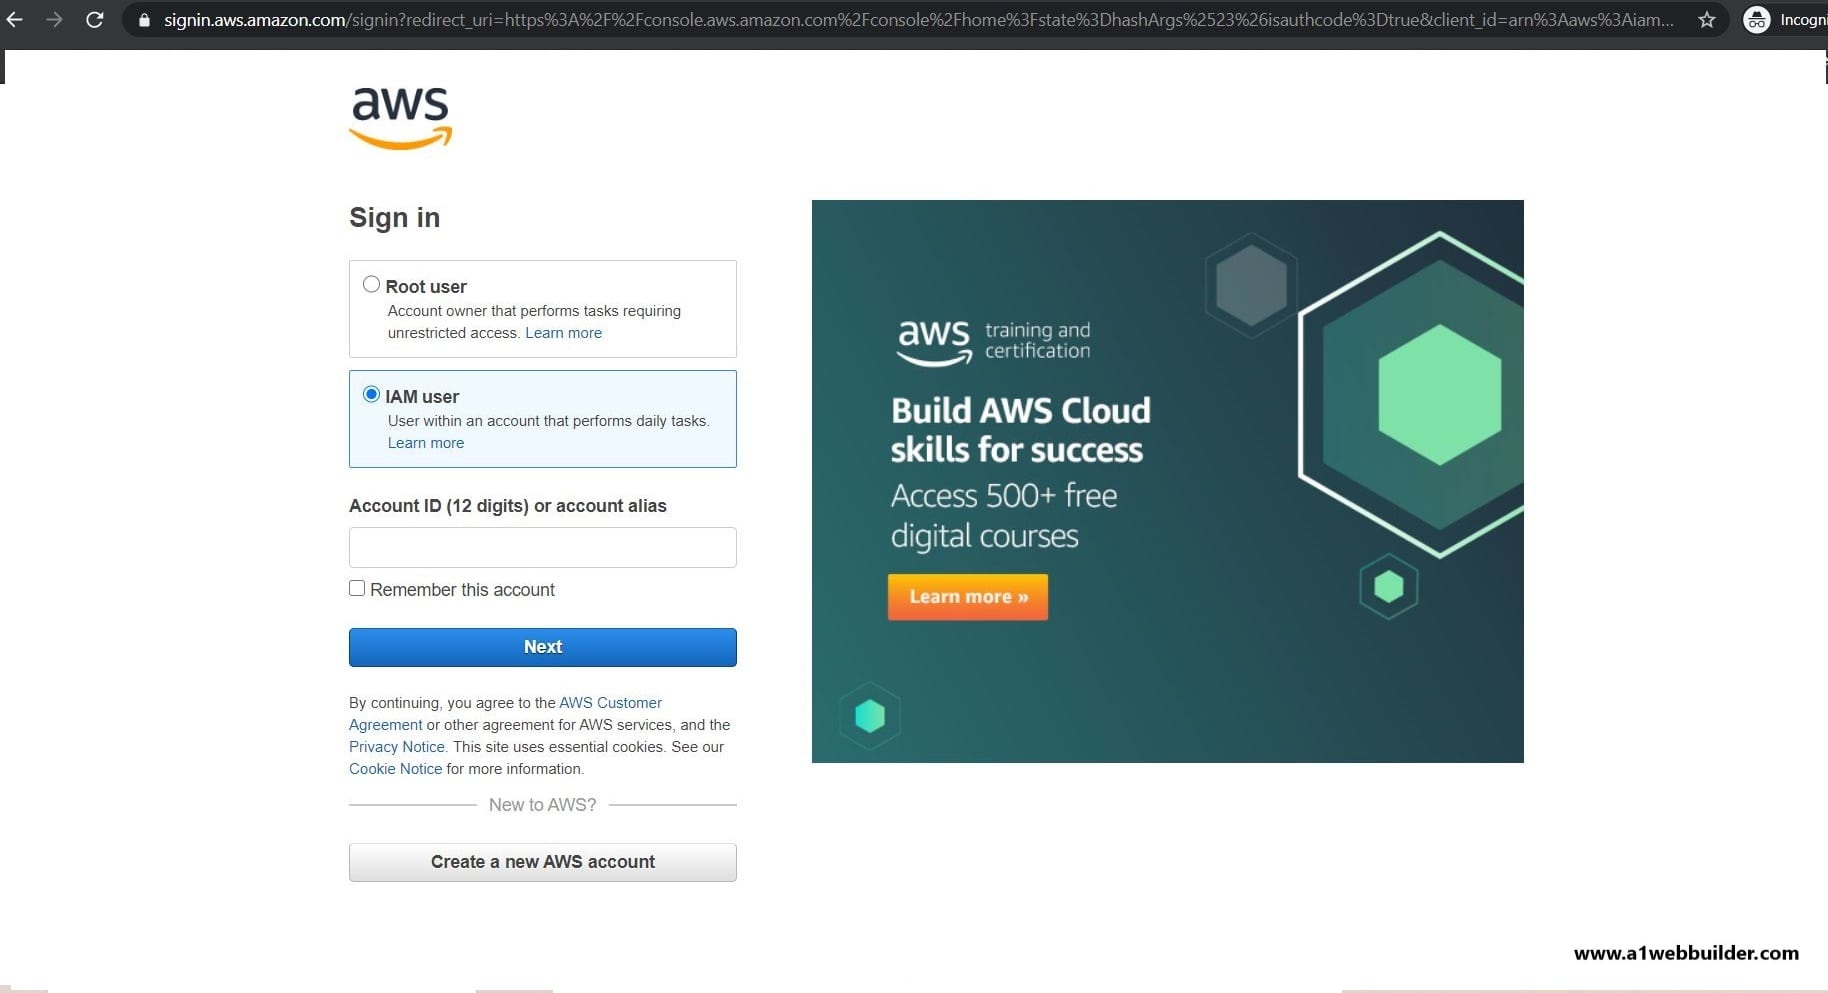
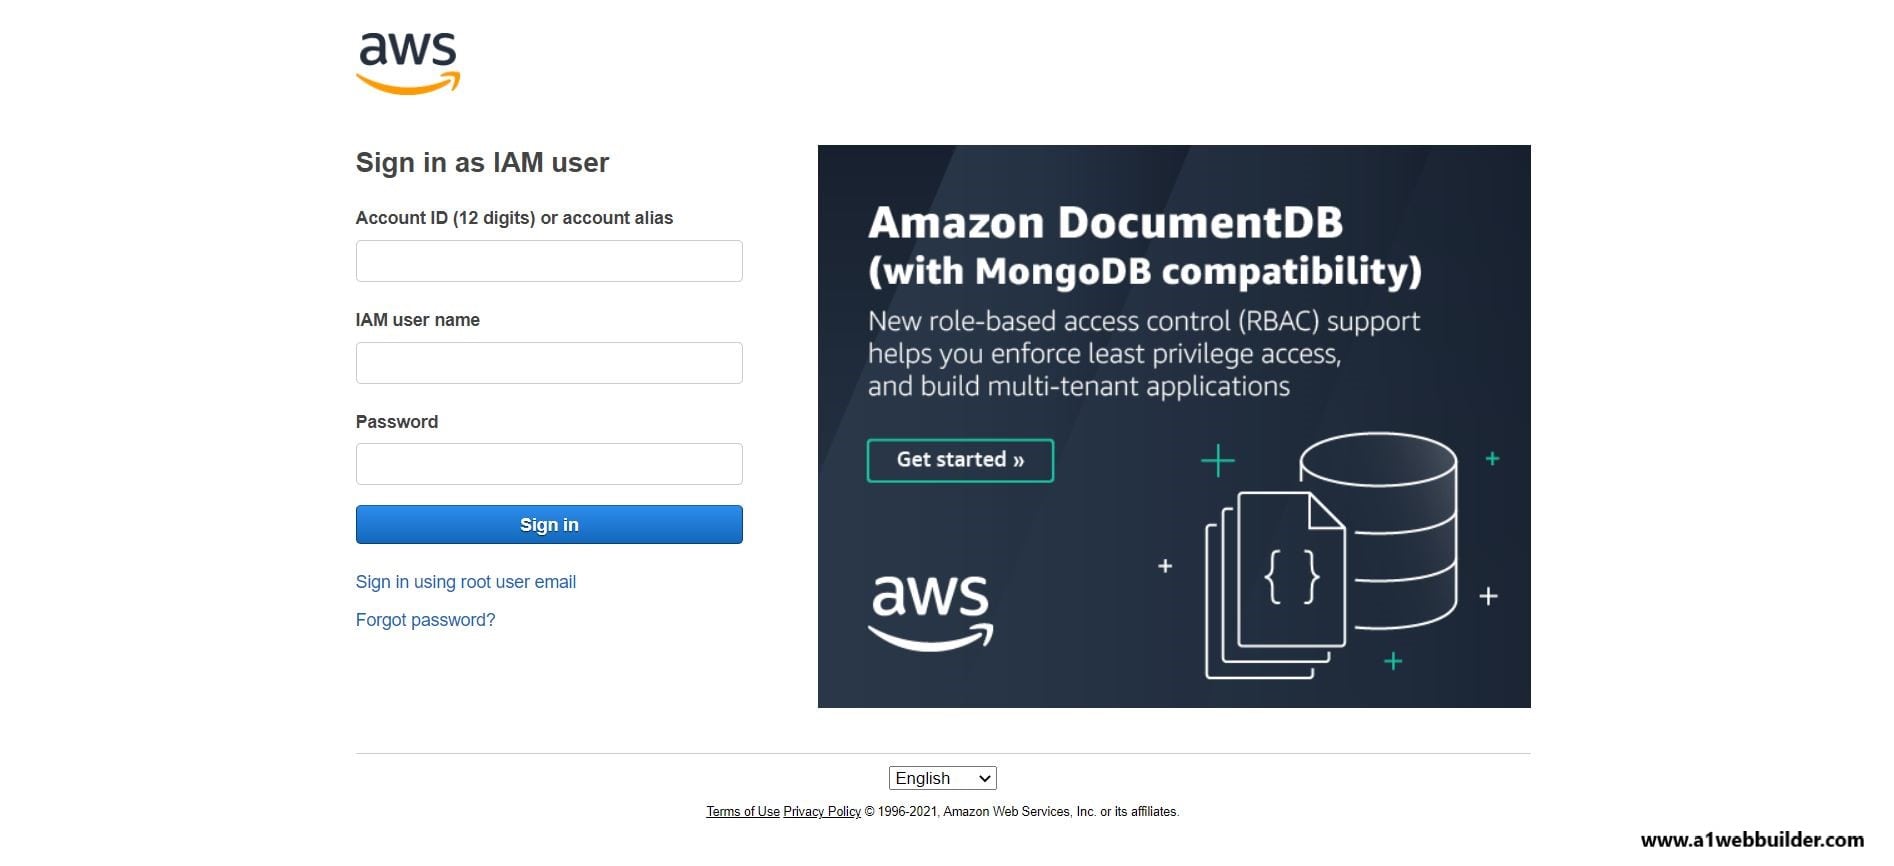
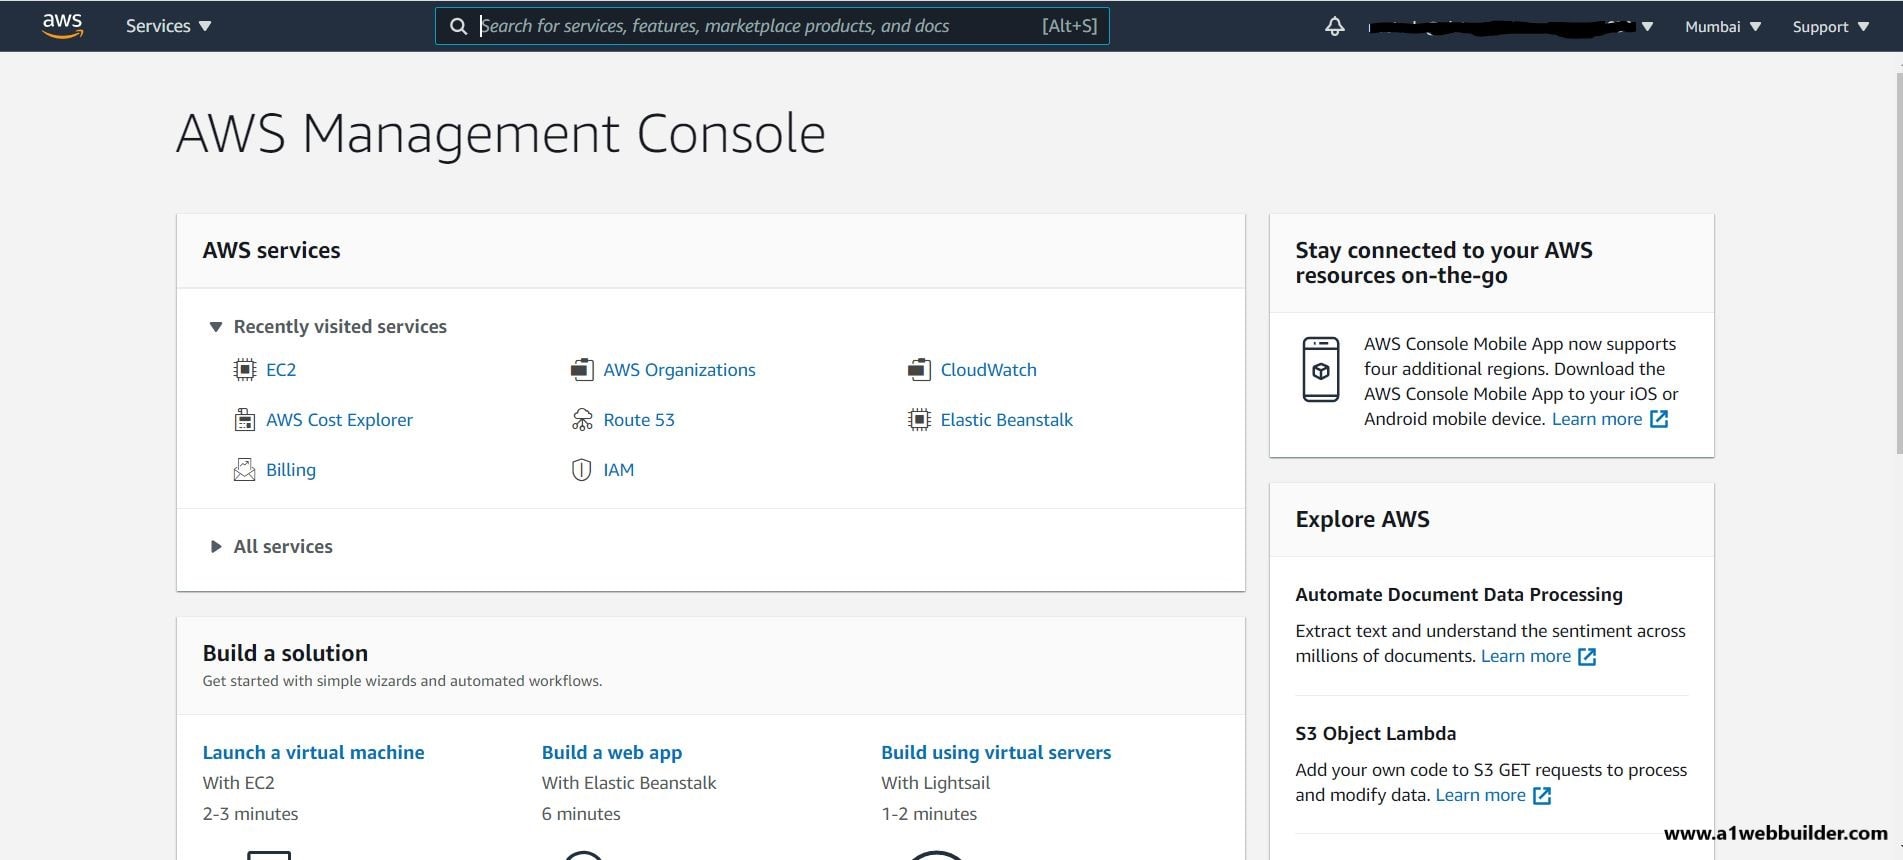
Sign in to your AWS Cloud server with the IAM user credentials. This will ask for your Account Id, IAM Username, and Password. Fill up your details and this will open your AWS Cloud Service Dashboard.
Step 2: AWS Route53 setup and configuration
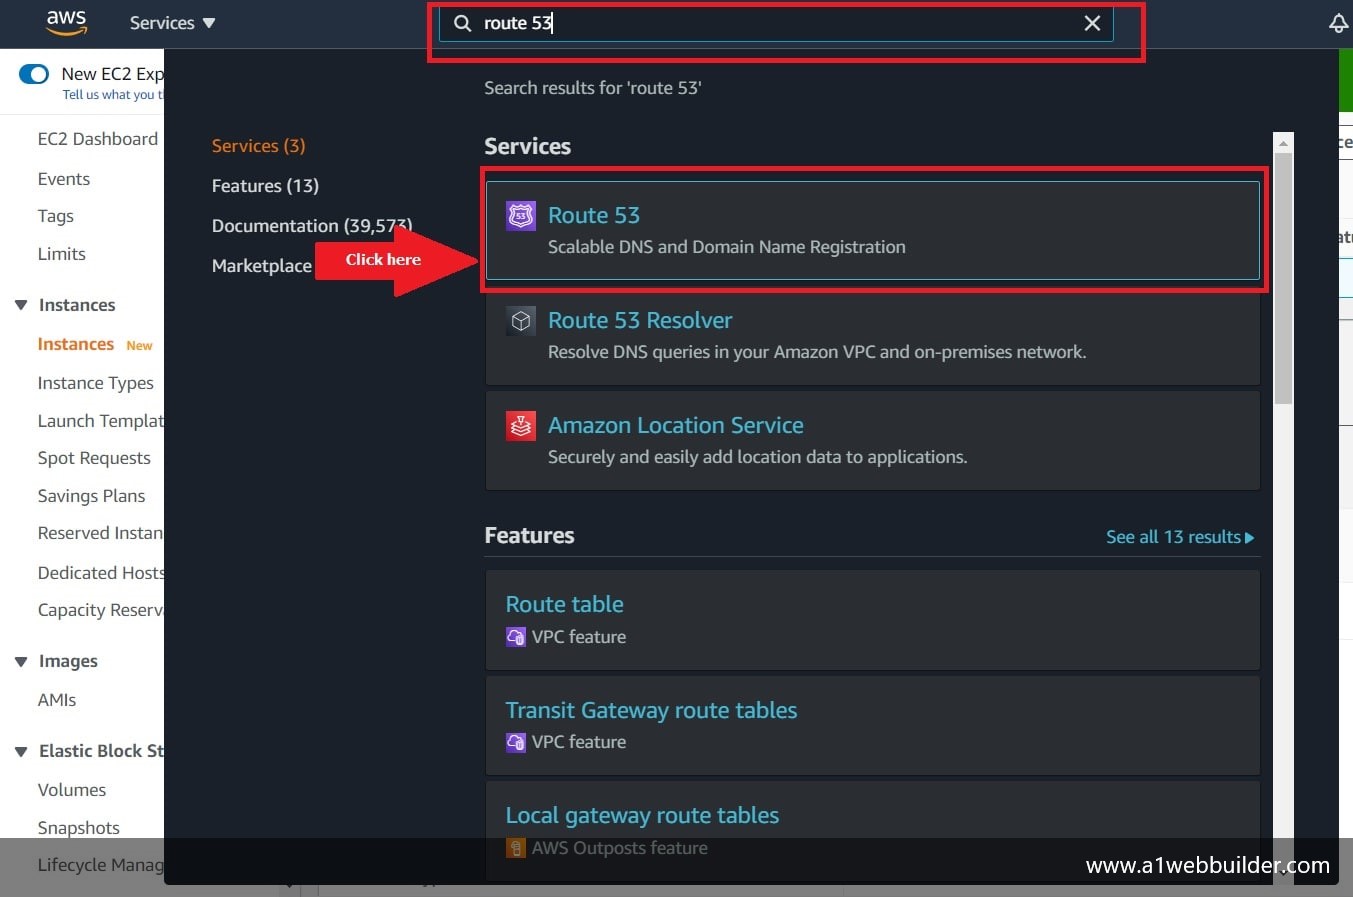
Search for “ROUTE53” at the top bar, the search filter will populate the AWS Services accordingly. Now select the ROUTE 53 from the list and this will open a new ROUTE53 Dashboard
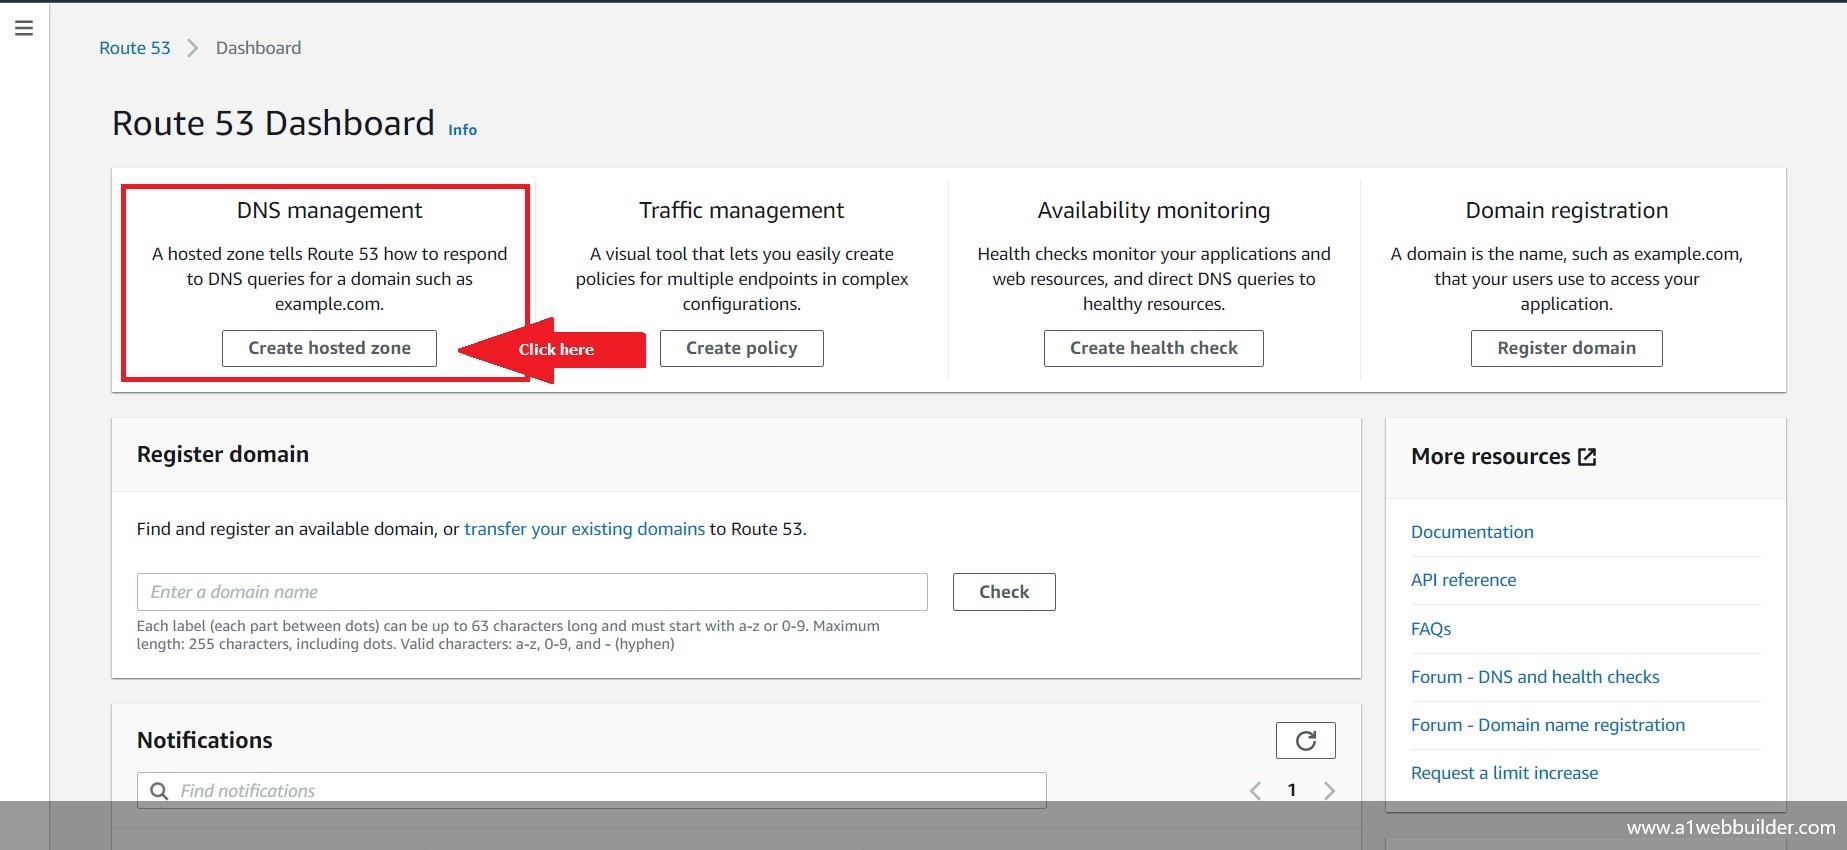
Once your ROUTE53 dashboard is open select the “Create Hosted Zone ” button. In this service, we will manage your domain name that is already purchased from other service providers like Godaddy, Bigrock, Hostgator, Bluehost, and many more. With the help of AWS ROUTE53, we will redirect these Domain names to AWS by changing the Name Servers.
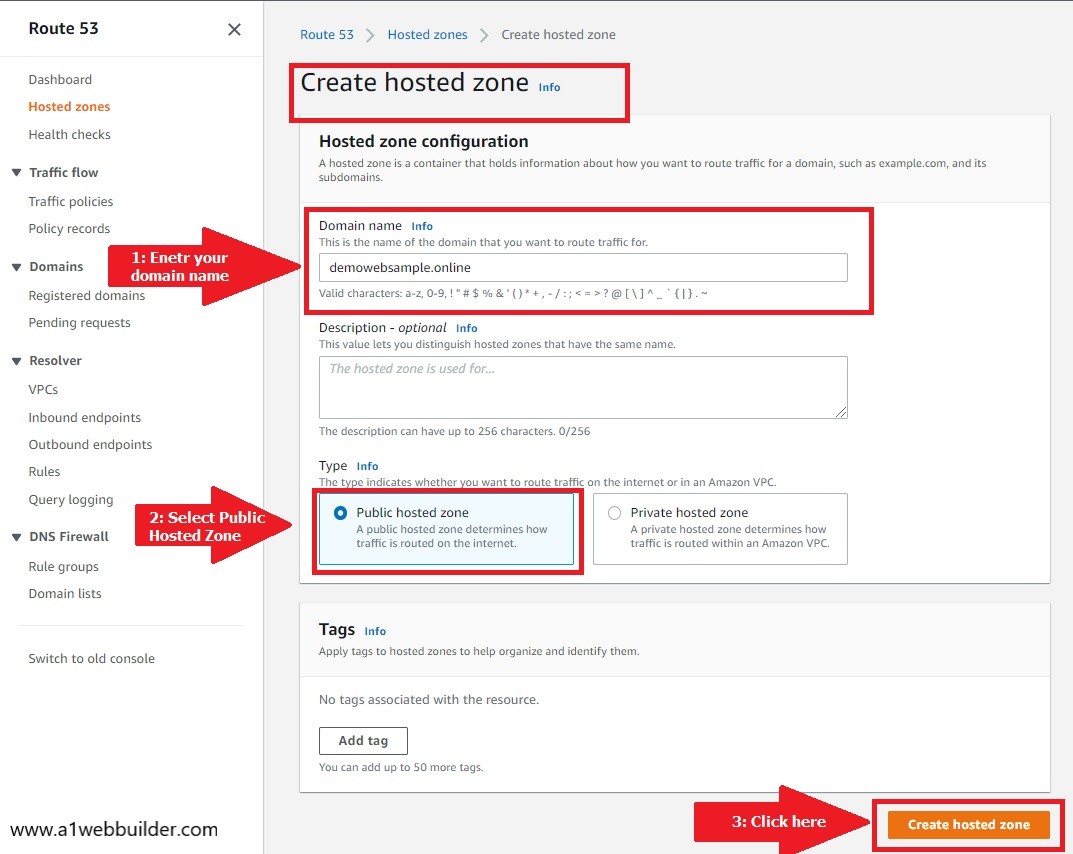
Under the Created hosted zone panel fill in the details for which you want to redirect and manage the domain name. In the domain name, enter the domain name for example “demowebsample.online” you can add your preferred domain name in this textbox.
To allow third-party domain providers to use AWS ROUTE53 you need to select “Public Hosted Zone” as your domain type and finally click on the “Create Hosted Zone” button to finish this process.
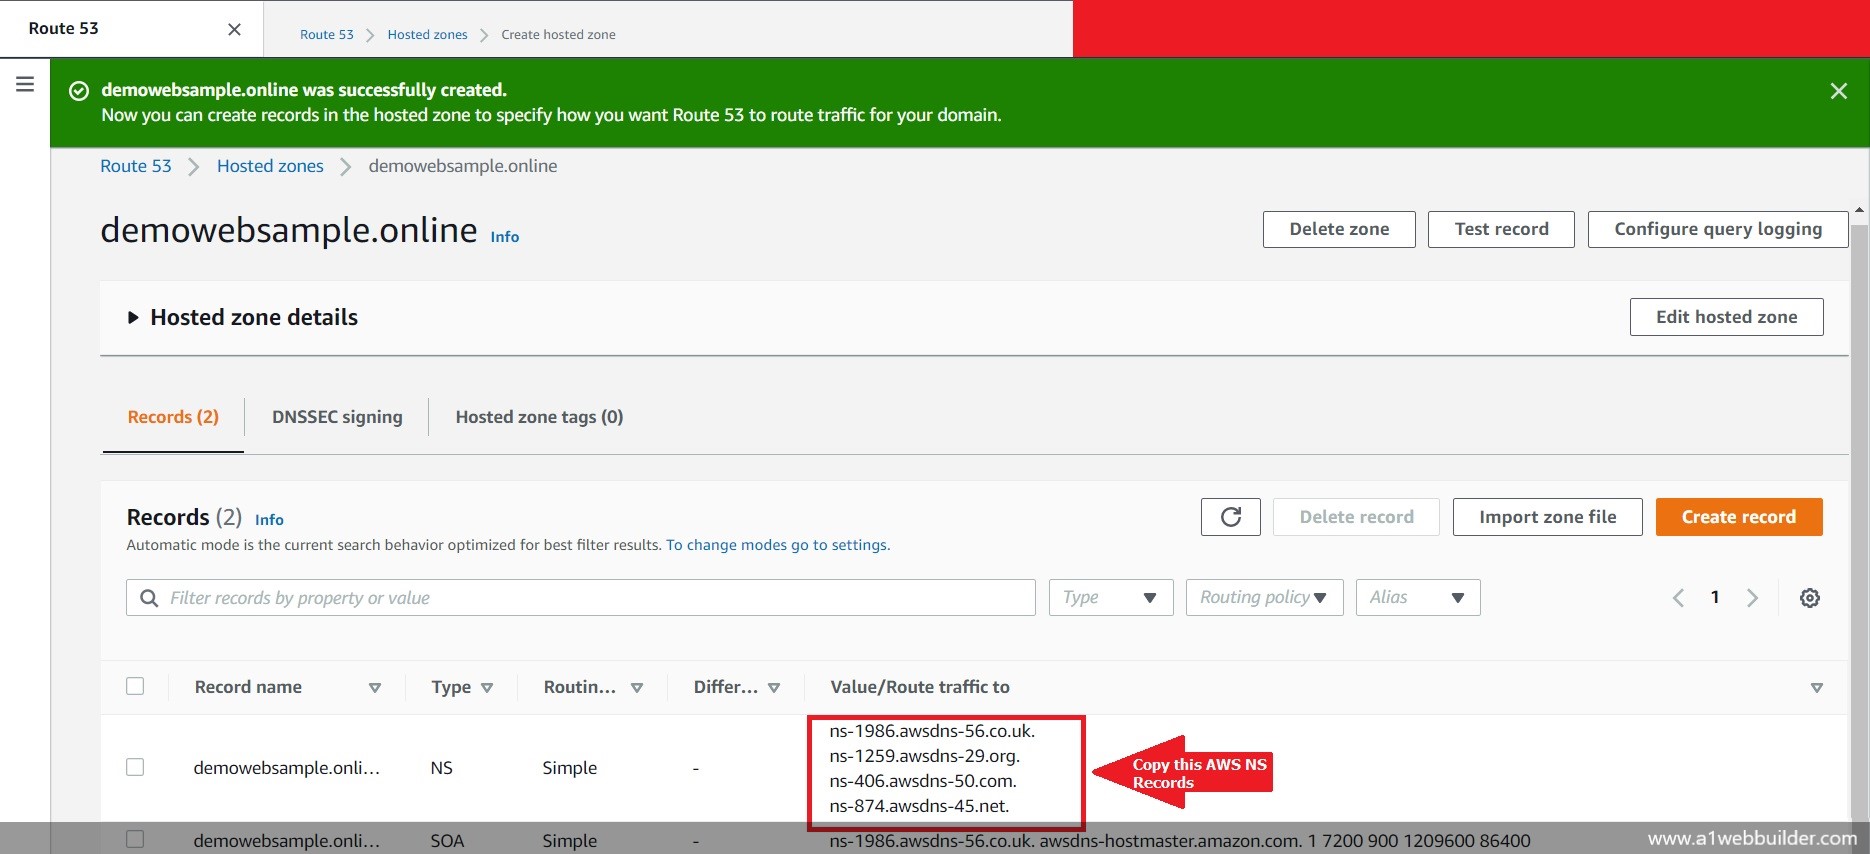
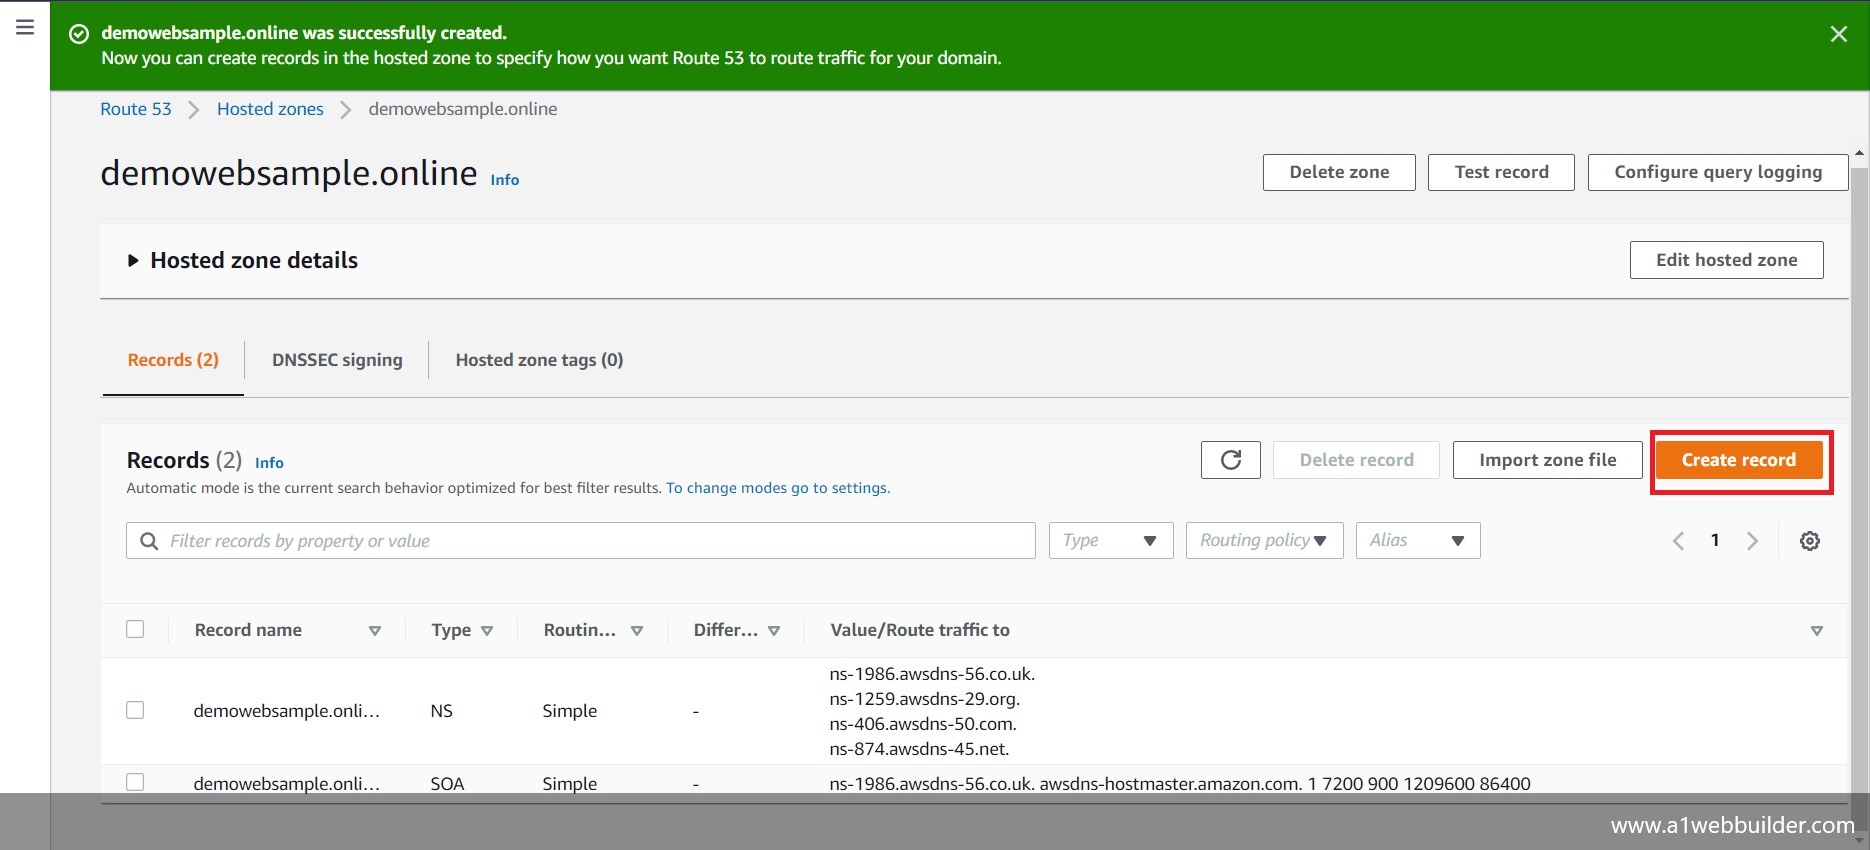
ROUTE53 will create a new DNS Record for your Website domain which you created. In my case, I have created for “demowebsample. online”. ROUTE53 has also provided Name Servers which is a very important and useful setting. We can use this Name Server to connect the third-party domain to our AWS ROUTE53.
Now, we also want our website to start with “WWW “ so that on the URL it will be visible as “www.yourwebsitename.com” in my case the name will be “www.demowebsample.online”
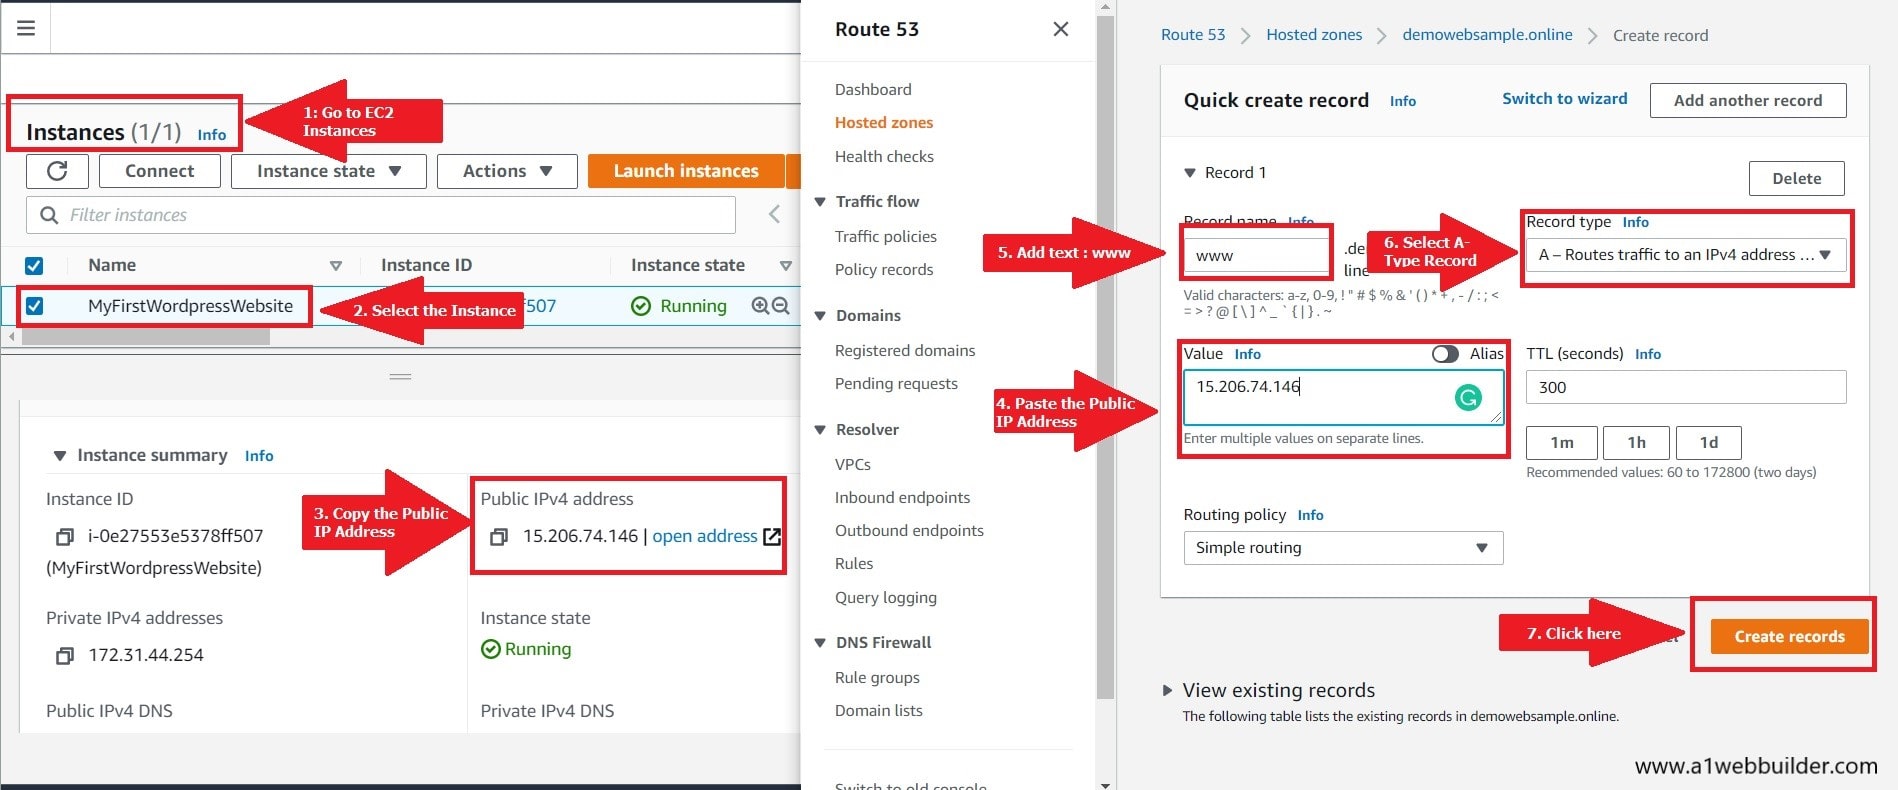
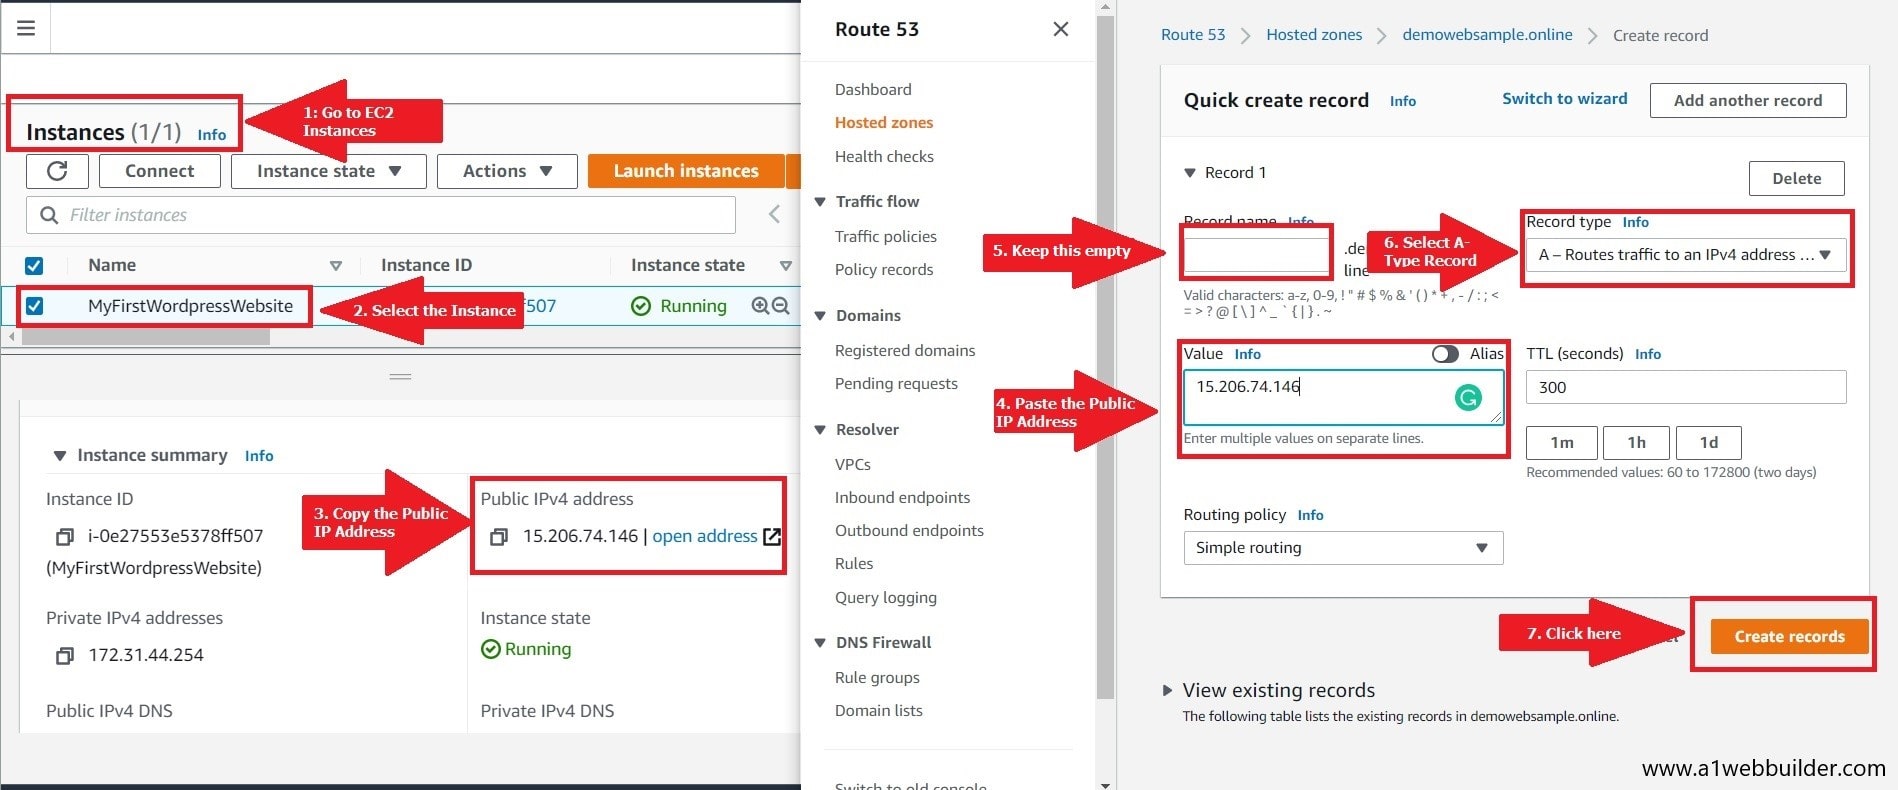
You need to first Go to the Instances Dashboard, to do this simply type EC2 at the top bar, and from the search list select the EC2 service and open the EC2 Dashboard. After this select the EC2 instance where your WordPress website is hosted and copy the public IPv4 IP Address.
Once you have copied the Public IPv4 address go back to your ROUTE53 Dashboard > Created Hosted Zone > Add New Record
Now under the value text box paste the public IPv4 address you just copied. In the Record Name, Text Box adds name as “www” in small letters, Record Type as “A- Route traffic to an IPv4 address” and click on the “Create records” Button.
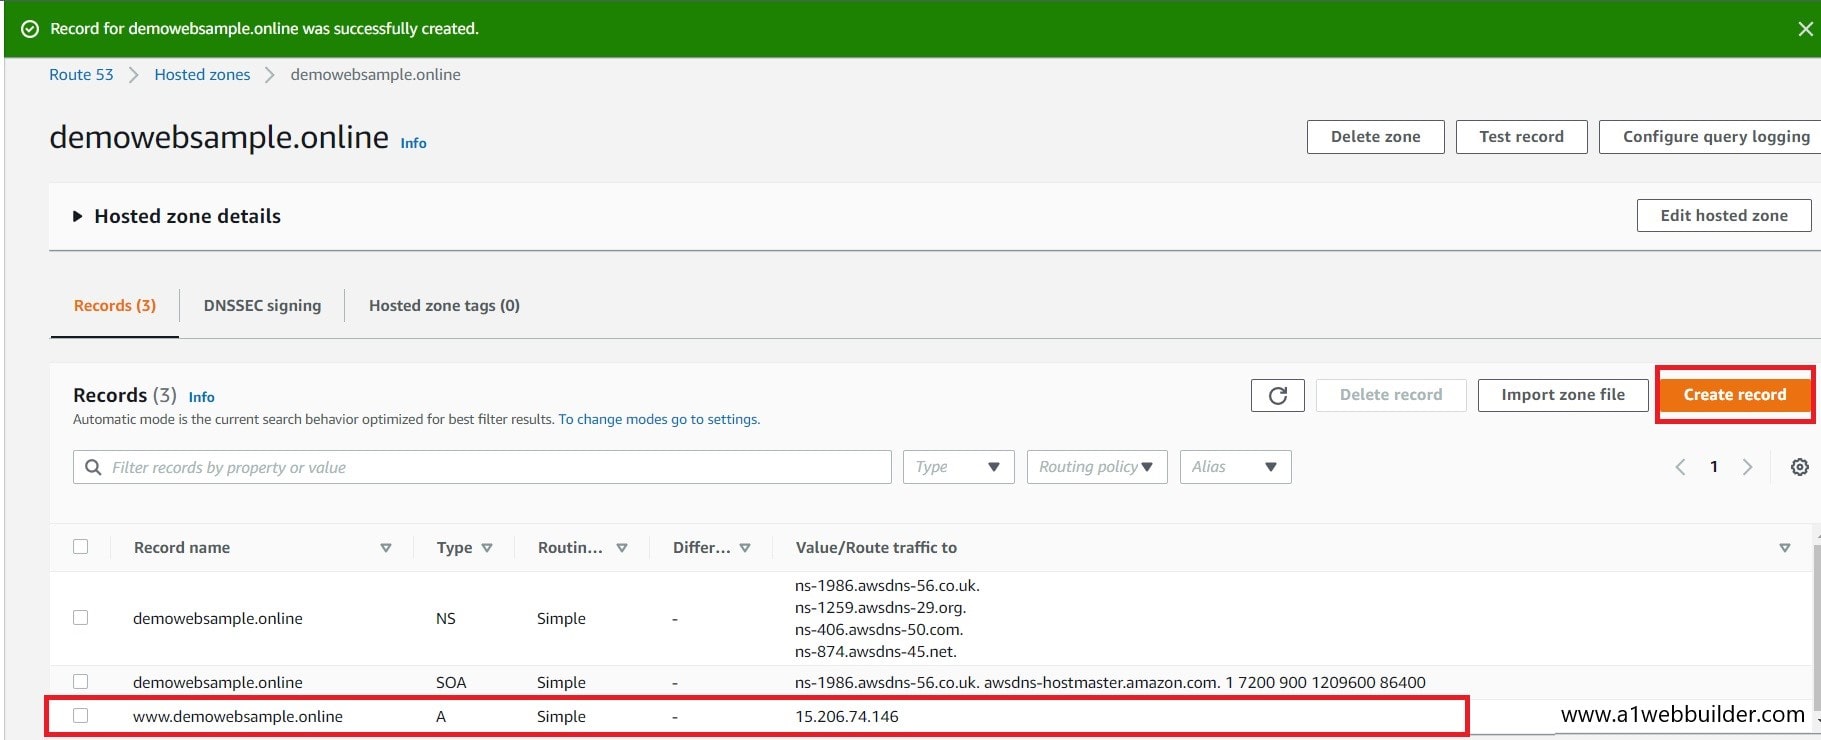
The ROUTE53 will add a new record in the table so that your website domain will start with “www”.
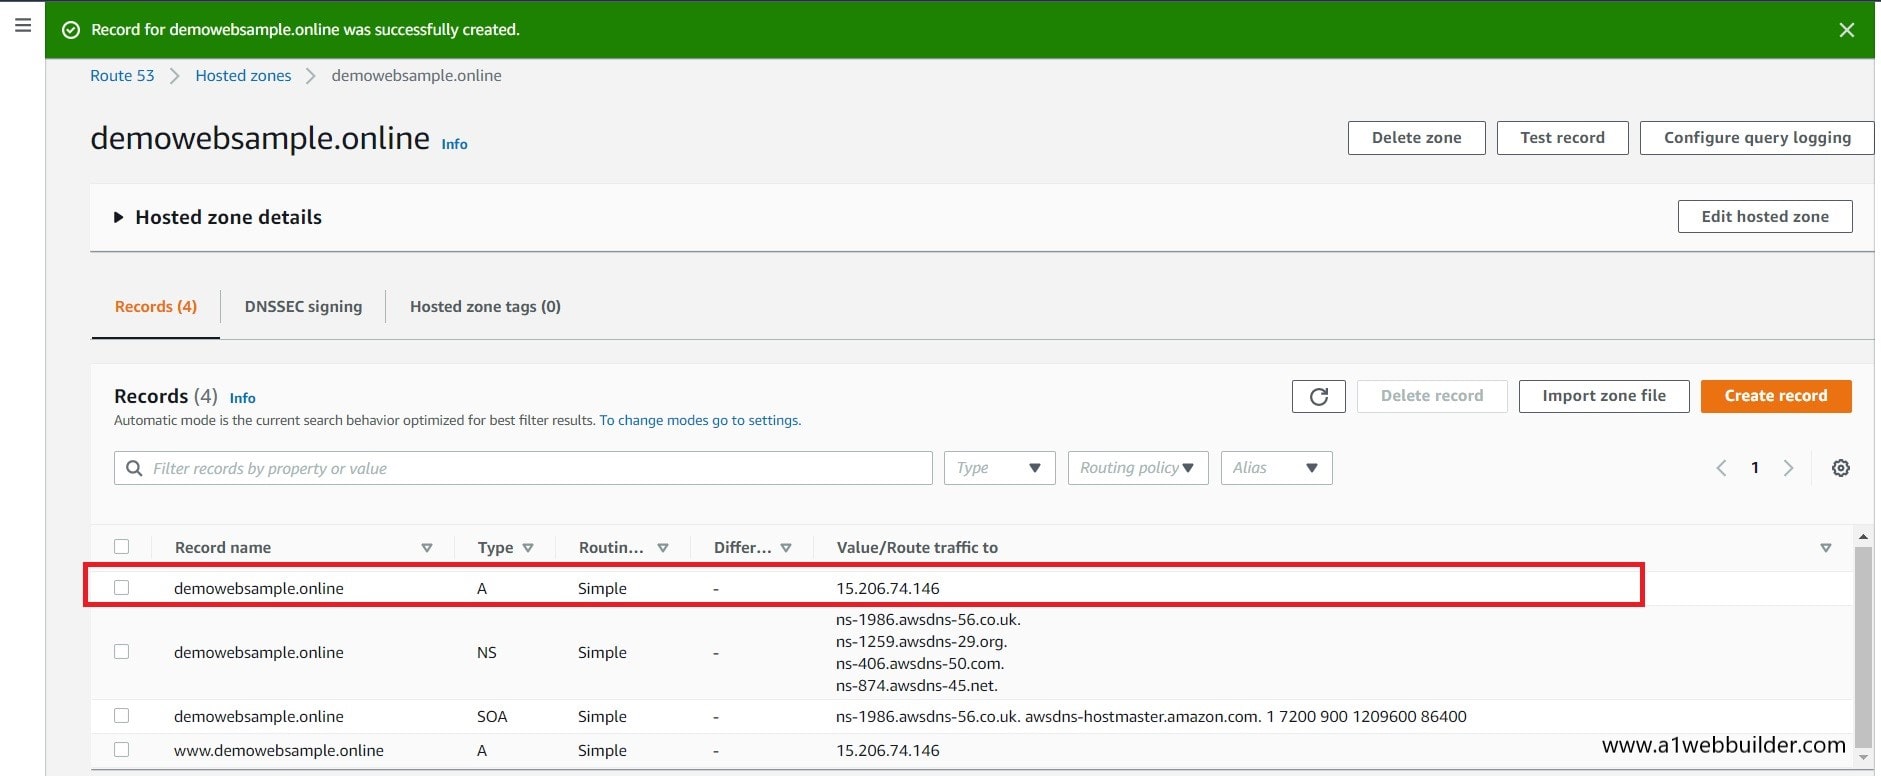
We will also require this domain to directly start with your domain name for example “demowebsample.online” which is without “www”. For this, we will repeat the same process but this time will keep the record name empty and complete other details as we did in the previous step.
Step 3: Change the NS (Name Server ) setting on your Website Domain Provider
In this step, we will log in to the domain provider from where you purchased your website domain.
There are multiple domain providers available online such as AWS, Godaddy, Bigrock, Hostgator, Bluehost, and many more.
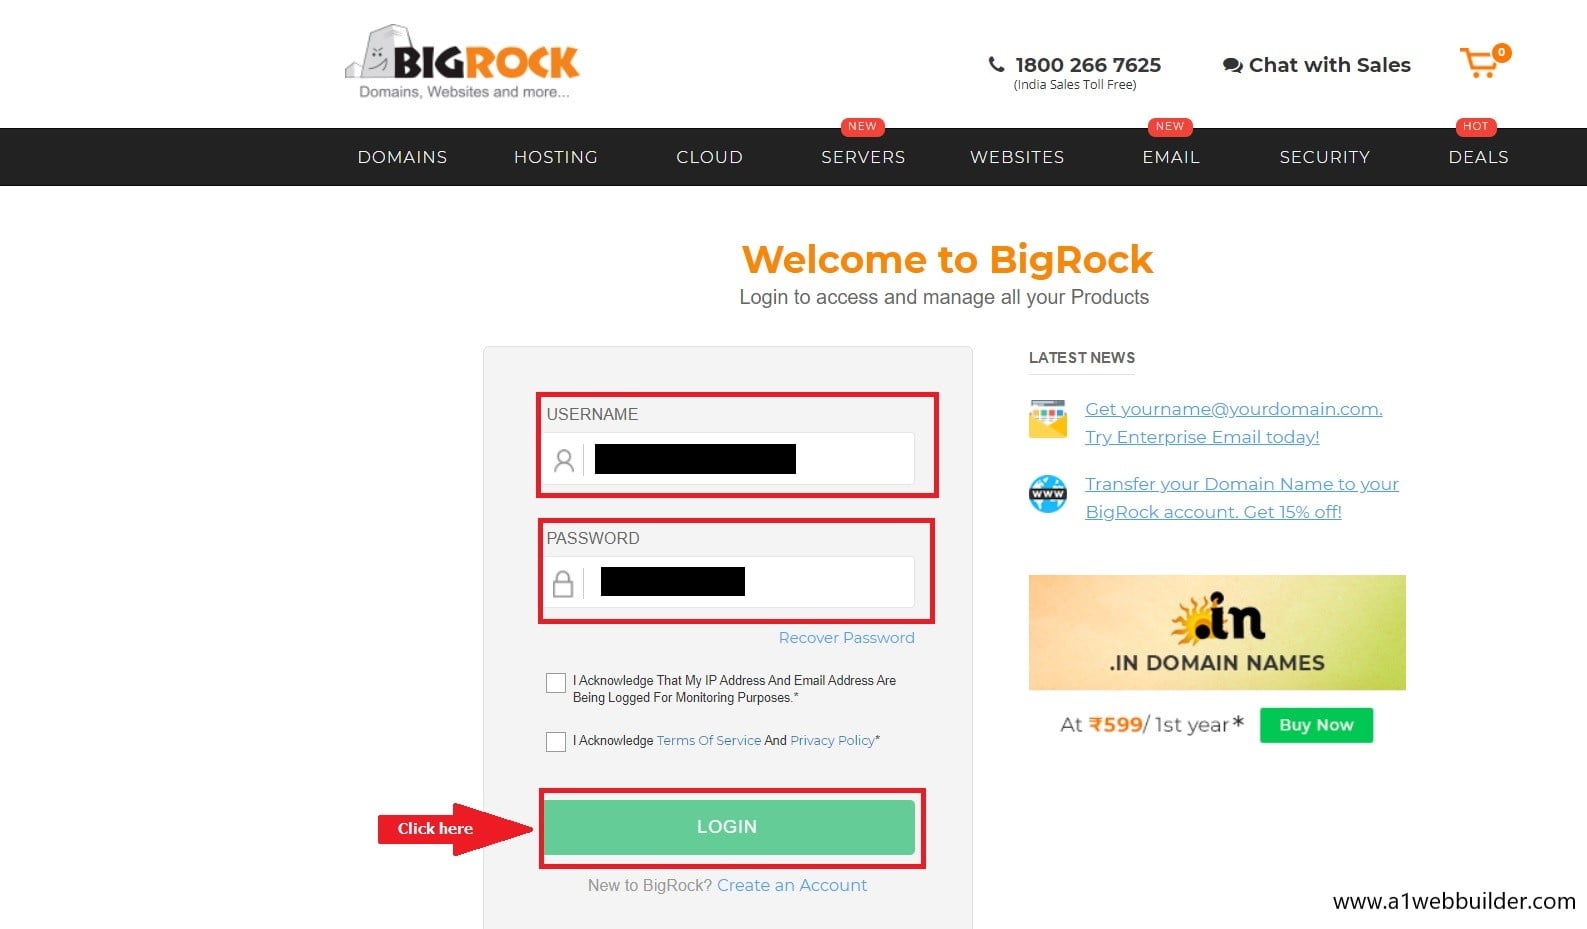
Now go to your domain provider Website and Login into your dashboard. In my case, my domain name that is “demowebsample.online” is hosted on Big Rock Domain Provider
Enter your credentials to log in to your domain service provider dashboard.
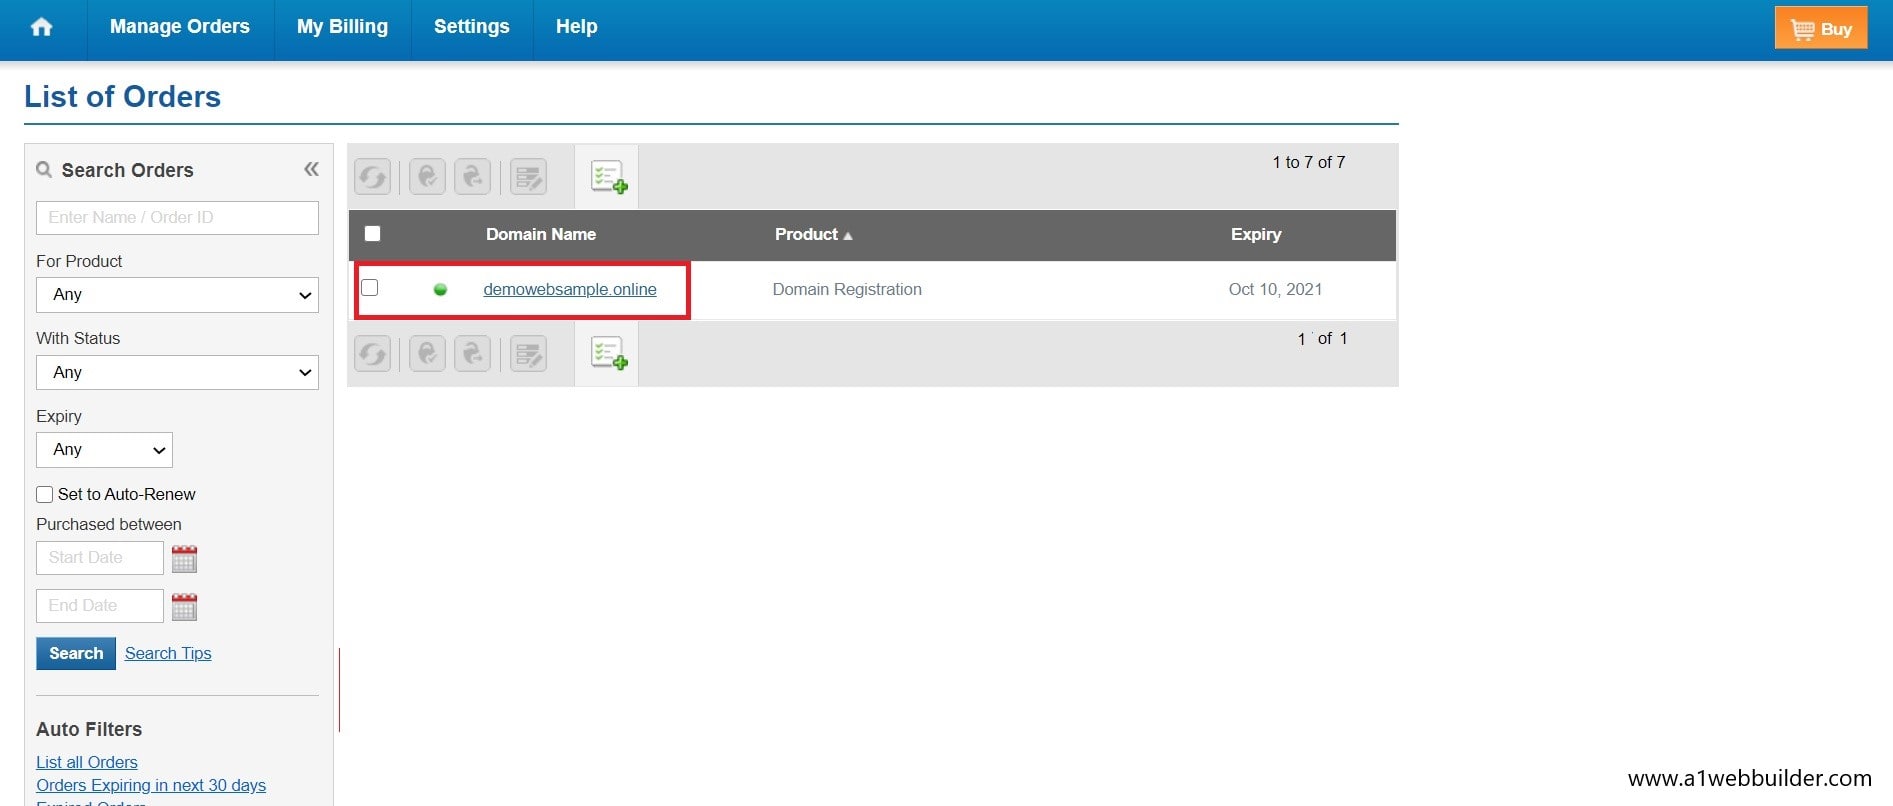
Once the dashboard is open, select the Website domain name for which you want to change the NS(Name Server)
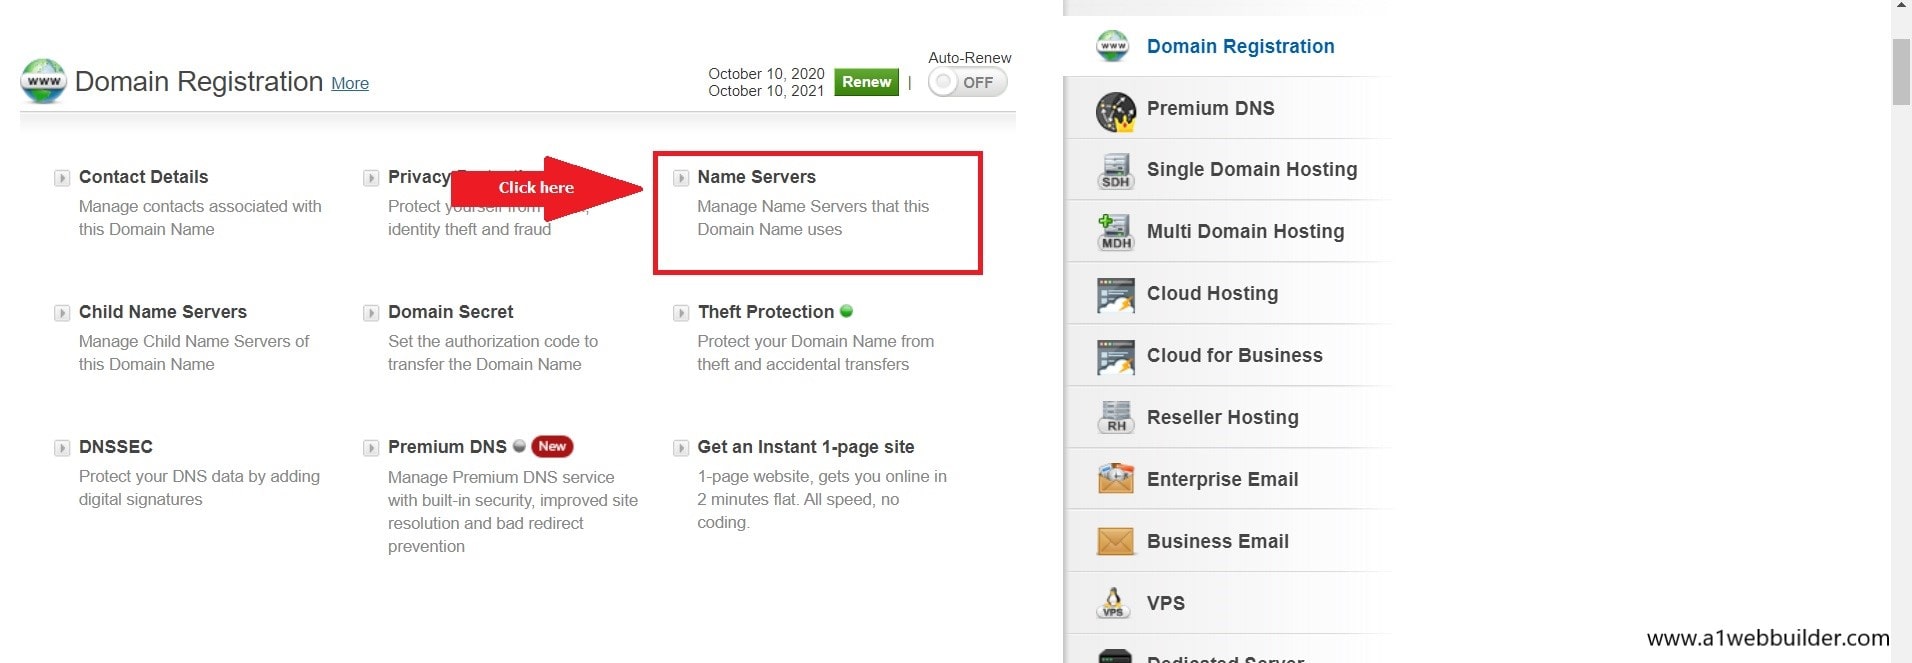
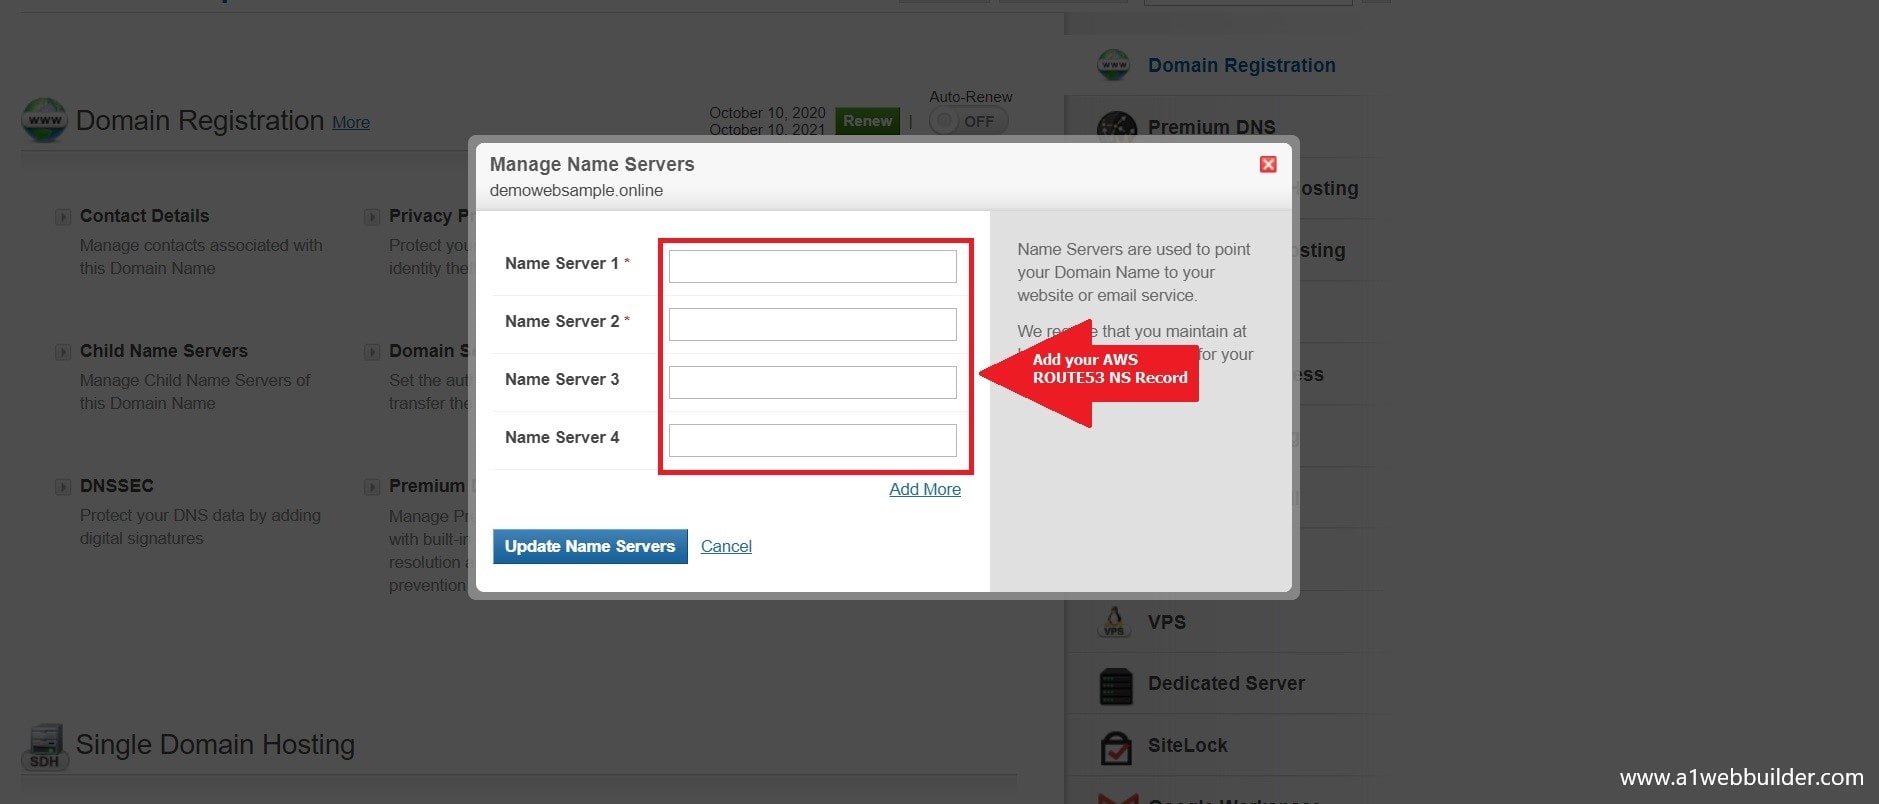
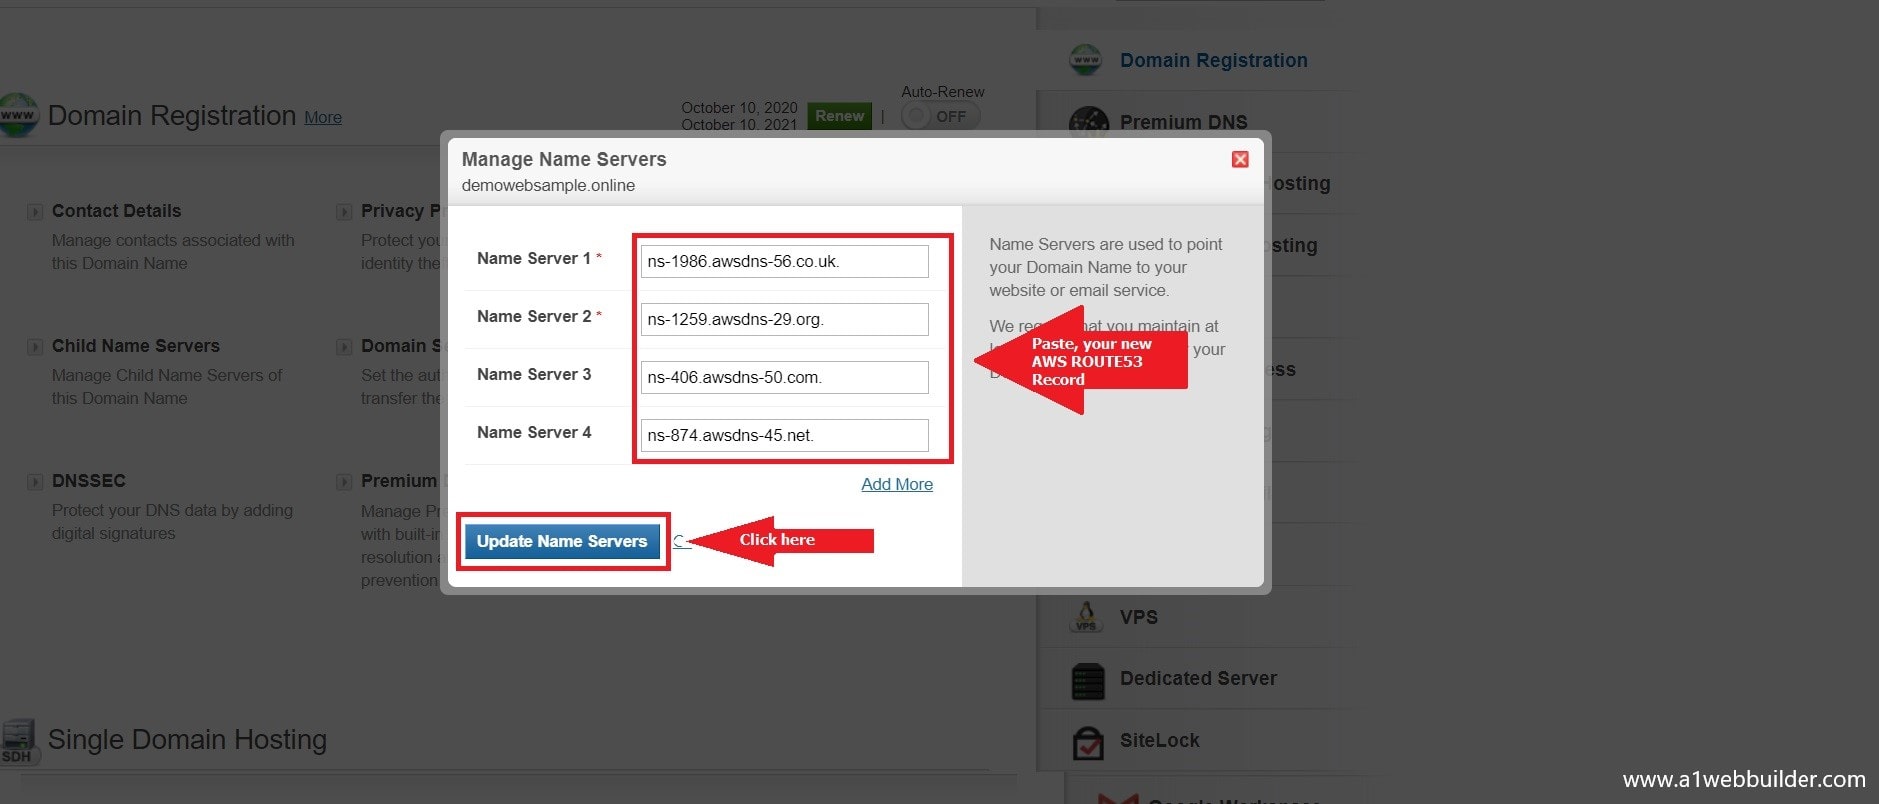
Click on the Name Server text from the list, this will open a pop-up box where you need to add the NEW AWS ROUTE53 NS records.
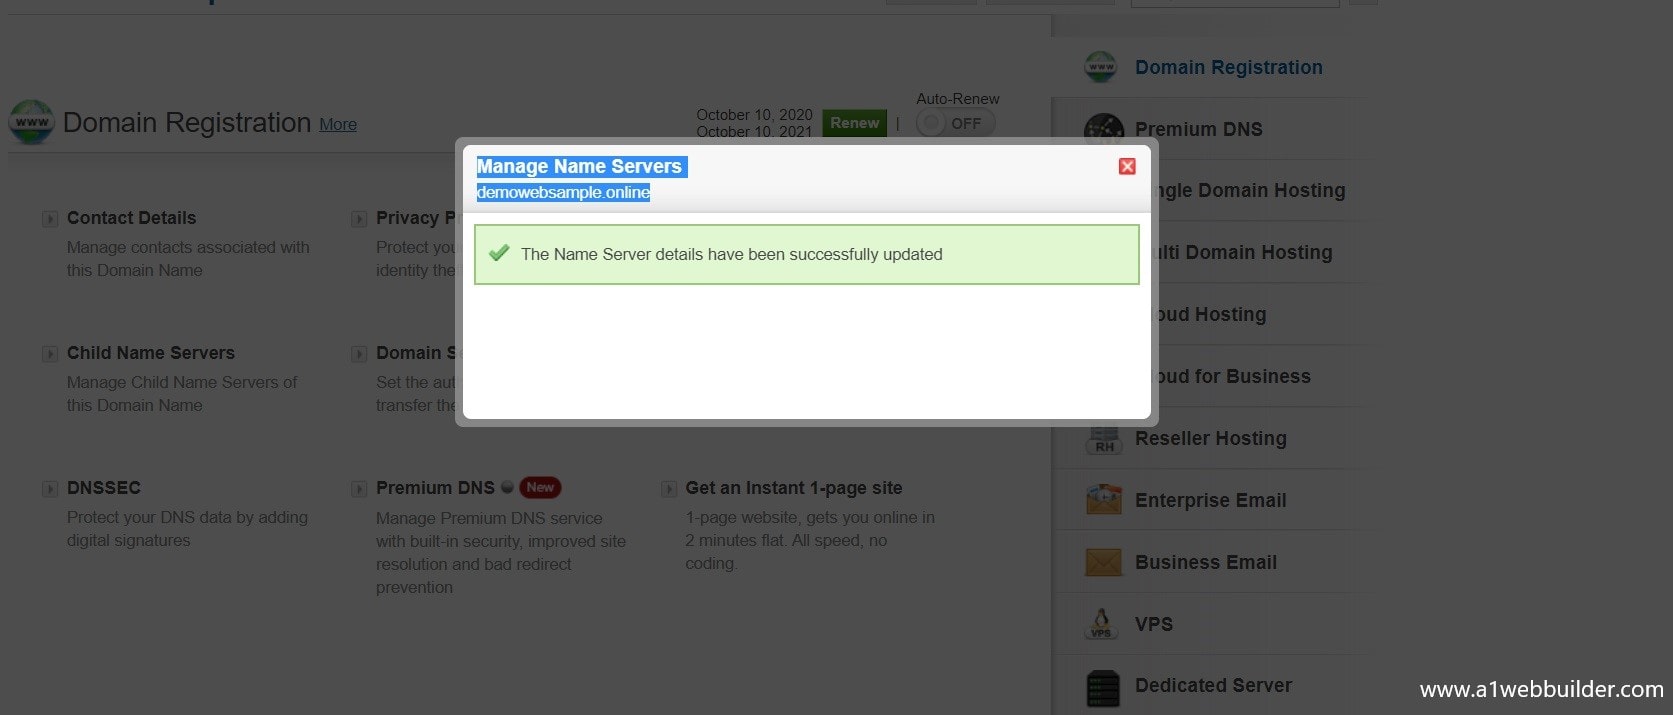
Copy the NS records from the ROUTE53 and paste them to the Domain provider NS Record Text Box
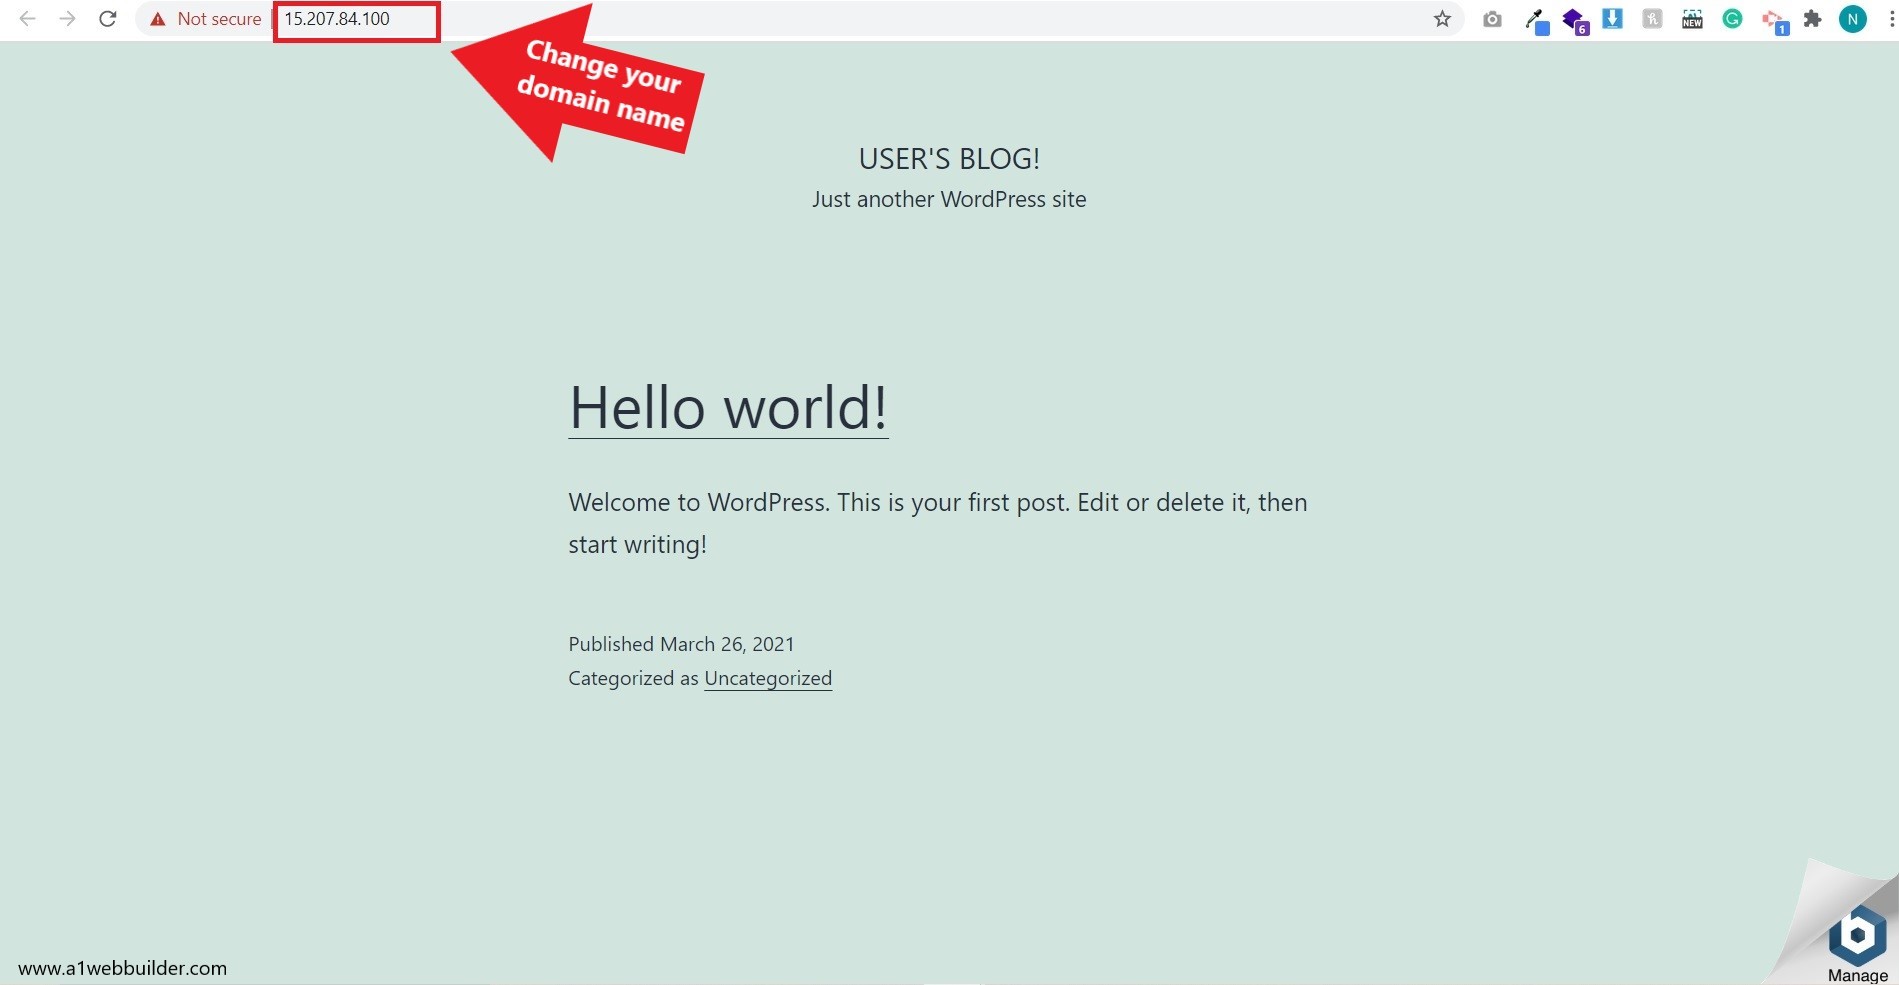
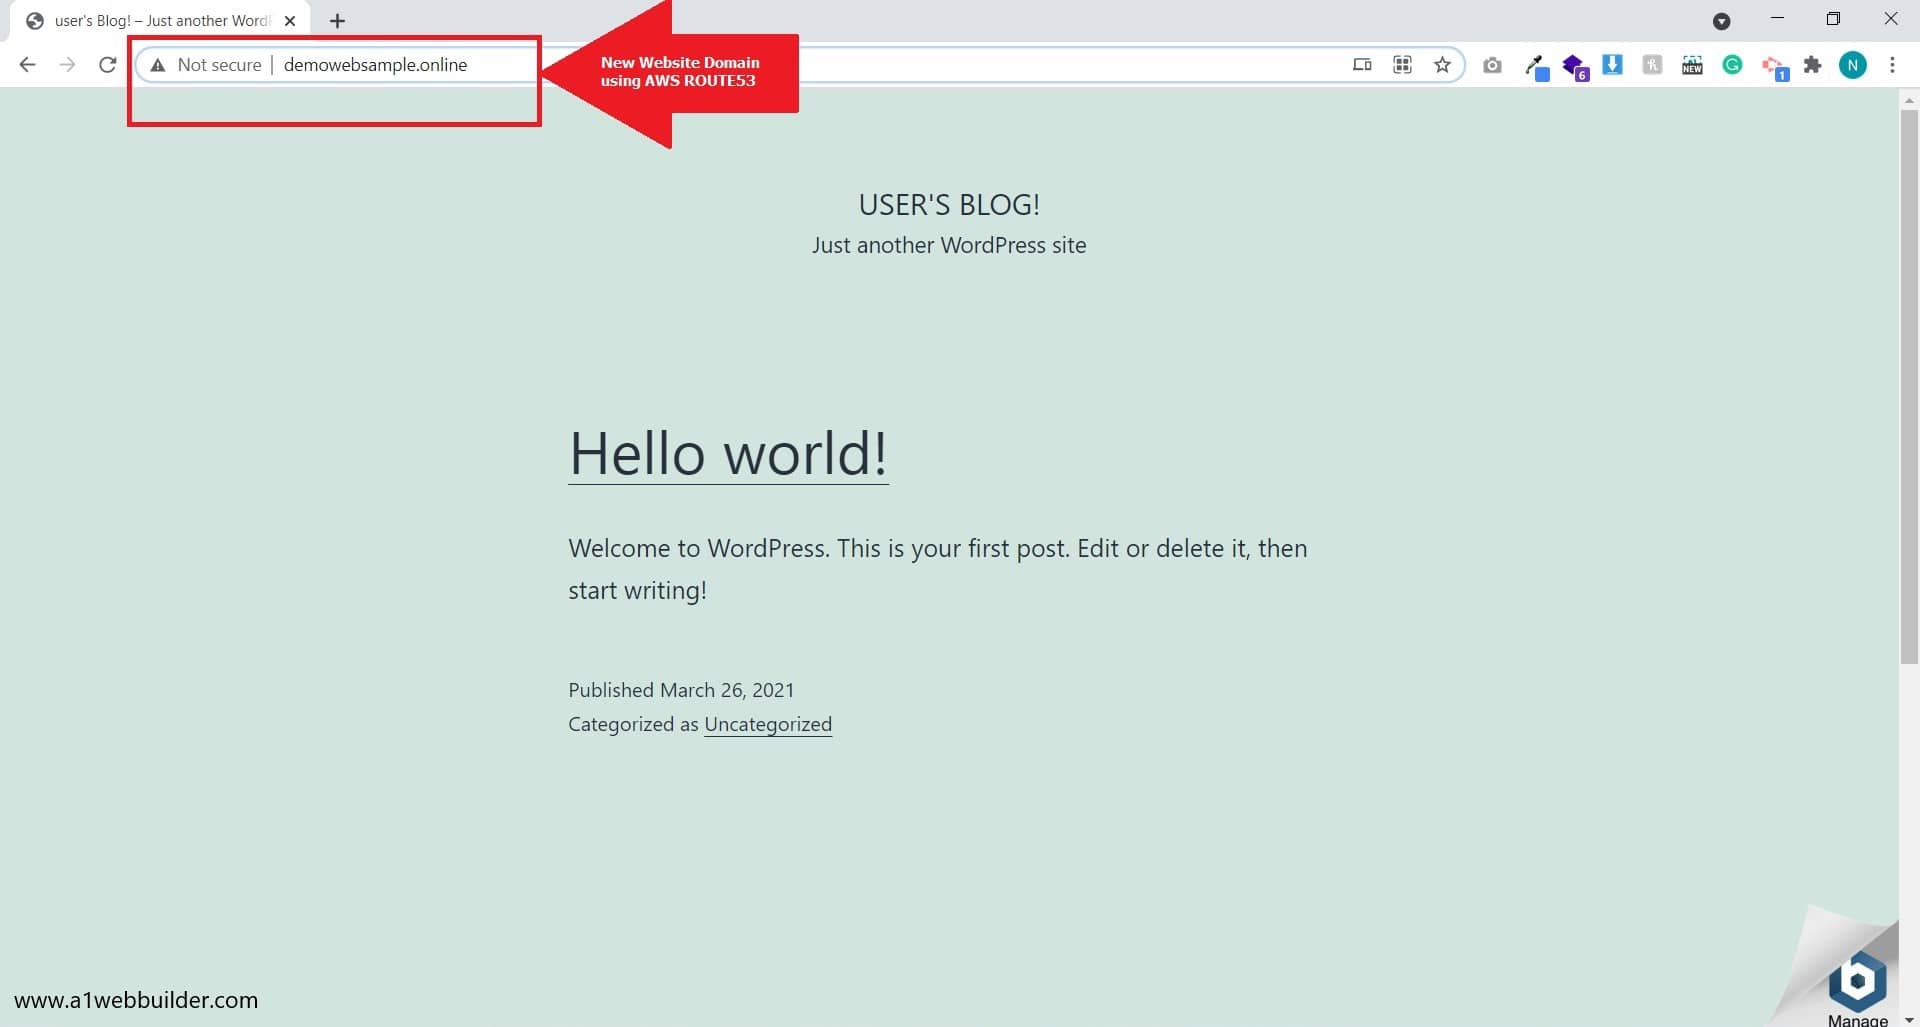
All the steps needed to run your website with the domain name are completed. In less than 30 minutes your DNS server will be refreshed and your website will be visible with a proper domain name. It will start with “www”
Now let us try with “http://www.demowebsample.online” on the browser URL and hit enter
We as a team at A1webbuilder are highly skilled and qualified to develop and protect your website with a premium facility and quality service including the industry’s standard. We can deliver your website within your time frame and provide the best result. Feel free to discuss your new project or business goal, call us on +91 7208 328 691, contact us or drop us a mail at info@a1webbuilder.com.


